apacheのSSL化
自宅PCのvineを6.5にアップグレードしました。
やっと32bitから64bitOSに載せ替えたのでやったことを日記に残します。
まずはapacheのインストール
apt-get install apache2
普段はCentをいじっているんでhttpdではなくapache2と指定するのに違和感を覚えます。
サービスを起動して動作確認します。
service apache2 restart

そっけない画面が出たのでapacheが無事起動できました。
次にSSL化に必要なモジュールを入れます。
apt-get install mod_ssl-apache2
mod_sslがインストールされたら、次にSSLで使用する秘密鍵を作ります。まずはkeyファイルから
openssl genrsa > server.key
こんな感じでできます
    Generating RSA private key, 1024 bit long modulus
    ........++++++
    .......++++++
    e is 65537 (0x10001)
次にCSRファイルです。CSRファイルは認証局にサーバ証明書を発行してもらう時に使用するファイルで すが今回は、オレオレ認証のため適当に作ります。
    openssl req -new -key server.key > server.csr
    You are about to be asked to enter information that will be incorporated
    into your certificate request.
    What you are about to enter is what is called a Distinguished Name or a DN.
    There are quite a few fields but you can leave some blank
    For some fields there will be a default value,
    If you enter '.', the field will be left blank.
    -----
    Country Name (2 letter code) [AU]:JP
    State or Province Name (full name) [Some-State]:
    Locality Name (eg, city) []:
    Organization Name (eg, company) [Internet Widgits Pty Ltd]:
    Organizational Unit Name (eg, section) []:
    Common Name (e.g. server FQDN or YOUR name) []:
    Email Address []:

    Please enter the following 'extra' attributes
    to be sent with your certificate request
    A challenge password []:
    An optional company name []:
最後にサーバ証明書です。本来は認証局でcsrファイルを提出して正式な証明書を発行してもらうところですが今回は、ローカルで使うものなのでオレオレ証明書を作ります。
    openssl x509 -req -signkey server.key < server.csr > server.crt
    Signature ok
    subject=/C=JP/ST=Some-State/O=Internet Widgits Pty Ltd
    Getting Private key
出来上がった秘密鍵とサーバ証明書の配置します。どこに配意という明確なものはないですが デフォルトで設定されている場所にkeyファイルとcrtファイルを配置します。
    mv server.key /etc/apache2/conf/ssl.key
    mv server.crt /etc/apache2/conf/ssl.crt
移動先のフォルダパスが存在しない場合はあらかじめ作ってから移動しますが、vineでは 作られていたので特にmkdirコマンドは不要です。
配置したら/etc/httpd/conf.d/ssl.confの中に、配置した鍵と証明書のパスを設定します。
emacs /etc/apache2/conf.d/ssl.conf
ssl.confの以下2行を修正します。
    SSLCertificateFile /etc/apache2/conf/ssl.crt/server.crt
    SSLCertificateKeyFile /etc/apache2/conf/ssl.key/server.key
保存してapacheを再起動します。
service apache2 restart
これでhttpsでアクセスできると思うのでhttps://でアクセスします。
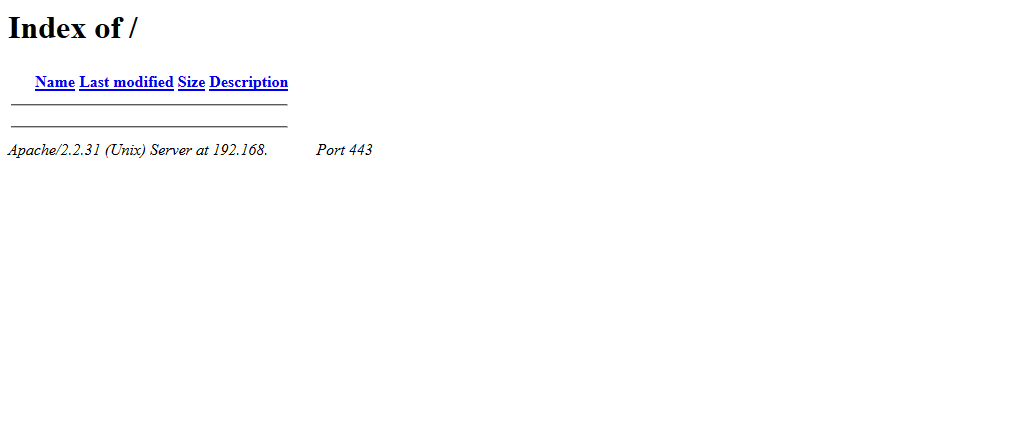
port443と出ていますのでhttpsでアクセスできました。
今回はオレオレ証明書で作りましたが、正式な所ではちゃんと認証キーを作ってくださいね。
Dockerのイメージを削除する
最近忙しくてブログが書けていませんでしたが
そろそろGWも近いので家のPCの環境を今勉強中のdocker,ansibleとか使って
整理していきたいと思ってます。
そこでまずは勉強で使っていたdockerイメージを削除していったんきれいにします。
まずはimageの確認から
$ docker images
REPOSITORY          TAG                 IMAGE ID            CREATED             SIZE
centos              7                   2d194b392dd1        6 weeks ago         195MB
hello-world         latest              f2a91732366c        5 months ago        1.85kB
前回hello-worldと表示するだけのコンテナとcentosのコンテナを落としているため 2つ表示されています。
さっそくこのイメージを削除したいのですがdockerにはimegeとは別にコンテナがあるため 停止しているコンテナをすべて排除してからイメージを消すときれいに消えてくれるようです。 なのでまずはコンテナを削除します。
# docker rm -v $(docker ps -aq -f status=exited)
bc336a7d461c
3a910b78f0f9
6235b59692ed
3つ消えてくれましたどうやら2つのイメージで3つのコンテナがあったようです。
次に本命イメージを削除。まずはcentosから
$ docker rmi 2d194b392dd1
Untagged: centos:7
Untagged: centos@sha256:dcbc4e5e7052ea2306eed59563da1fec09196f2ecacbe042acbdcd2b44b05270
Deleted: sha256:2d194b392dd16955847a14f969b2dd319251471ffa6356be6d8f16c5bf53db9b
Deleted: sha256:b03095563b7956c62ae5a6d20e5959a950e3b1a96d4404c00b7da7393847494a
docker rmiはイメージの削除を表し、その後ろは削除するimegeIDを指定します。 なんかいろいろ出てますがどうやら、中間ファイルらしいです。
消えたか確認します。
$ docker images
REPOSITORY          TAG                 IMAGE ID            CREATED             SIZE
hello-world         latest              f2a91732366c        5 months ago        1.85kB
centosが消えていることが確認できました。続けてhello-worldを消します。
$ docker rmi f2a91732366c
Untagged: hello-world:latest
Untagged: hello-world@sha256:66ef312bbac49c39a89aa9bcc3cb4f3c9e7de3788c944158df3ee0176d32b751
Deleted: sha256:f2a91732366c0332ccd7afd2a5c4ff2b9af81f549370f7a19acd460f87686bc7
Deleted: sha256:f999ae22f308fea973e5a25b57699b5daf6b0f1150ac2a5c2ea9d7fecee50fdf
消えたか確認します
$ docker images
REPOSITORY          TAG                 IMAGE ID            CREATED             SIZE
残っているコンテナがないか合わせて確認
$ docker ps -a
CONTAINER ID        IMAGE               COMMAND             CREATED             STATUS              PORTS               NAMES
残っているコンテナもないようです。
docker imageを消す場合は先にコンテナを消しからイメージを消せばゴミが残ることなくきれいに消えてくれるようです。 今回コンテナを消すときに、動いていないコンテナをすべて削除するコマンドで消しましたが、これだと必要なコンテナまで 消してしまうので、通常はdocker ps を実行して消したいコンテナのコンテナIDを調べてからdocker rm [コンテナID]を実行するよう にしてください。
DockerにCentOS7のイメージを入れてみた
このところ仕事でjavaのspringでとある企業のカートシステム作ったり、pythonでAPIやらツール作ったり、phpでできているサイトの修正をしたり、はたまたある人からhaskell教のすばらしさを教えられ入信するなどぶっ飛んだことばかりしていて肝心のDokerが全然できていなかったので、今日は朝からCentOSに入れたDockerにDockerイメージを入れて遊んでみたいと思います。
Dockerのインストール方法は、以前の記事を参照してください。
まずはDockerHubよりCentOSのイメージをpullします。git感覚ですね。
docker pull centos:7
ダウンロードしたらdocker imagesで入っているイメージを確認します。
    docker images
    REPOSITORY          TAG                 IMAGE ID            CREATED             SIZE
    centos              7                   2d194b392dd1        4 days ago          195MB
    hello-world         latest              f2a91732366c        3 months ago        1.85kB
結果には今落としたcentosのイメージと以前Dockerインストール時に落としたhello-worldが表示されています。
ではcentosを起動しましょう。
docker run centos:7
起動しているか確認
    docker ps -a
    CONTAINER ID        IMAGE               COMMAND             CREATED              STATUS                          PORTS               NAMES
6b8c087cbd0f        centos:7            "/bin/bash"         About a minute ago   Exited (0) About a minute ago                       festive_goldberg
a5be73c9d526        hello-world         "/hello"            3 weeks ago          Exited (0) 3 weeks ago                              unruffled_franklin
statusをみると”Exited (0) About a minute ago”と出ています。どうやら落ちているようです。/bin/bashにアクセスできていないようなので起動引数を追加して再度起動。
    docker run -i -t -h kodama centos:7
    [root@kodama ~]#
コマンドプロンプトが変わりました。コンテナが起動出来たようです。
ちなっみに-hはコンテナにホスト名を設定するときに使います。今回は「kodama」と付けました。(うちのPC名はすべて新幹線の名前からとっているので)
コンテナの情報はdocker inspectで確認できます。
docker inspect hungry_agnesi
「hungry_agnesi」はコンテナ名です。先ほどのdocker imagesでNAME欄を確認したうち実行してください。結果が長いので割愛しますがjsonで表示されます。ここではhost名とかIPアドレスなどが表示されるはずです。
次にコンテナ内でコマンドを実行してみます。今回はyum updateで試します。
yum update
結果は以下の通り
    Loaded plugins: fastestmirror, ovl
base                                                                                                                                  | 3.6 kB  00:00:00
extras                                                                                                                                | 3.4 kB  00:00:00
updates                                                                                                                               | 3.4 kB  00:00:00
(1/4): extras/7/x86_64/primary_db                                                                                                     | 181 kB  00:00:00
(2/4): base/7/x86_64/group_gz                                                                                                         | 156 kB  00:00:01
(3/4): updates/7/x86_64/primary_db                                                                                                    | 6.9 MB  00:00:30
(4/4): base/7/x86_64/primary_db                                                                                                       | 5.7 MB  00:00:33
Determining fastest mirrors
 * base: www.ftp.ne.jp
 * extras: www.ftp.ne.jp
 * updates: www.ftp.ne.jp
Resolving Dependencies
--> Running transaction check
---> Package libgcc.x86_64 0:4.8.5-16.el7_4.1 will be updated
---> Package libgcc.x86_64 0:4.8.5-16.el7_4.2 will be an update
---> Package libstdc++.x86_64 0:4.8.5-16.el7_4.1 will be updated
---> Package libstdc++.x86_64 0:4.8.5-16.el7_4.2 will be an update
---> Package systemd.x86_64 0:219-42.el7_4.7 will be updated
---> Package systemd.x86_64 0:219-42.el7_4.10 will be an update
---> Package systemd-libs.x86_64 0:219-42.el7_4.7 will be updated
---> Package systemd-libs.x86_64 0:219-42.el7_4.10 will be an update
--> Finished Dependency Resolution

Dependencies Resolved

=============================================================================================================================================================
 Package                                Arch                             Version                                     Repository                         Size
=============================================================================================================================================================
Updating:
 libgcc                                 x86_64                           4.8.5-16.el7_4.2                            updates                            98 k
 systemd                                x86_64                           219-42.el7_4.10                             updates                           5.2 M
 systemd-libs                           x86_64                           219-42.el7_4.10                             updates                           378 k

Transaction Summary
=============================================================================================================================================================
Upgrade  4 Packages

Total download size: 5.9 M
Is this ok [y/d/N]:
ちゃんとyumも動くようです。
エディタがviしかないのでemacsも入れます。
yum install emacs
インストール後emacsと入力するとemacsが起動出来ました。
次にapacheを入れてみます。
    yum install httpd
    cp -p /etc/httpd/conf/httpd.conf /etc/httpd/conf/httpd.conf.ORG
    sed -i -e 's/\#ServerName www.example.com:80/ServerName kodama/g' /etc/httpd/conf/httpd.conf
今回は動作確認だけにしますのでhttpdコマンドを実行してサーバを起動します。
httpd -k start
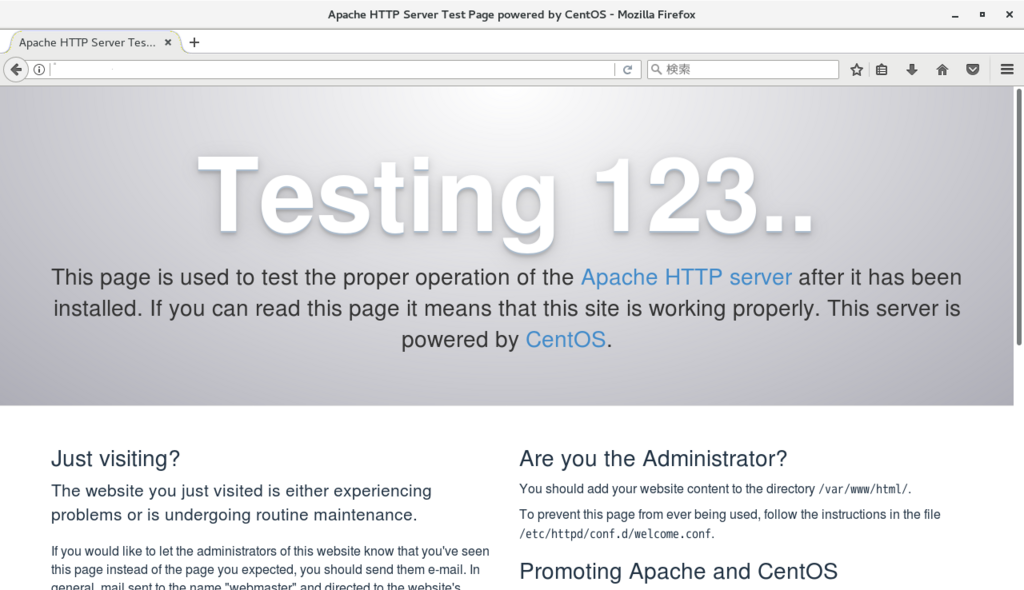
コンテナを終了するときはexitで終わります。
exit
次回はより実用的な方法で実践してみたいです。
yumが壊れたので修理する
yumを実行しようとしたら以下のエラーを吐いて終了する事態となってしまいました。
    File "/bin/yum", line 30

    except KeyboardInterrupt, e:
調べてみたらyumのスクリプトがpython2で動いているため前回記事にしたpython3に上げたことで動かなくなってしまったようです。そこで動くようになおしてみました。
まずはpythonのスクリプトをエディタで開きます。私はemacsを使うのでemacsで開きます。
emacs /usr/bin/yum
開いたら1行目の文言を以前入っていた2.7に変えます。
#!/usr/bin/python2.7
環境によっては入っているバージョンが違うので以下のコマンドでバージョンを確認しておいてください。
    cd /usr/bin/

    ll | grep python
修正したら動くか確認。yum updateで確認します。
しかしまた別の問題が・・・。
読み込んだプラグイン:fastestmirror, langpacks

Repository google-chrome is listed more than once in the configuration

base                                                               | 3.6 kB  00:00:00

code                                                               | 2.9 kB  00:00:00

docker-ce-stable                                                   | 2.9 kB  00:00:00

epel/x86_64/metalink                                               | 7.9 kB  00:00:00

epel                                                               | 4.7 kB  00:00:00

extras                                                             | 3.4 kB  00:00:00

google-chrome                                                      |  951 B  00:00:00

ius                                                                | 2.3 kB  00:00:00

ftp://mirrors.tummy.com/pub/rpm.livna.org/repo/7/x86_64/repodata/repomd.xml: [Errno 14] FTP Error 550 - Server denied you to change to the given directory

他のミラーを試します。

livna                                                              |  951 B  00:00:00

nux-dextop                                                         | 2.9 kB  00:00:00

updates                                                            | 3.4 kB  00:00:00

virtualbox/7/x86_64/signature                                      |  181 B  00:00:00

virtualbox/7/x86_64/signature                                      | 1.1 kB  00:00:00 !!!

  File "/usr/libexec/urlgrabber-ext-down", line 28

    except OSError, e:

                  ^

SyntaxError: invalid syntax

  File "/usr/libexec/urlgrabber-ext-down", line 28

    except OSError, e:

                  ^

SyntaxError: invalid syntax

  File "/usr/libexec/urlgrabber-ext-down", line 28

    except OSError, e:

                  ^

SyntaxError: invalid syntax

  File "/usr/libexec/urlgrabber-ext-down", line 28

    except OSError, e:

                  ^

SyntaxError: invalid syntax

  File "/usr/libexec/urlgrabber-ext-down", line 28

    except OSError, e:

                  ^

SyntaxError: invalid syntax


ユーザーのキャンセルで終了しています
これは別のpythonスクリプトが問題起こしているようなので問題のPythonを修正します。
以下のファイルを開きます。
emacs /usr/libexec/urlgrabber-ext-down
開いたら先ほど同様1行目の文言を以前入っていた2.7に変えます。
#!/usr/bin/python2.7
修正後、もう一回yum updateを実行。今度は動いたようです。
pythonのバージョンアップには気をつけましょう。
読み込んだプラグイン:fastestmirror, langpacks

Repository google-chrome is listed more than once in the configuration

Loading mirror speeds from cached hostfile

 * base: ftp.iij.ad.jp

 * epel: kartolo.sby.datautama.net.id

 * extras: ftp.iij.ad.jp

 * ius: mirrors.kernel.org

 * livna: wftp.tu-chemnitz.de

 * nux-dextop: li.nux.ro

 * updates: ftp.iij.ad.jp

依存性の解決をしています

・・・
Python3系に置き換える
CentOSにインストールされるPythonは2.x系とちょっと古い。2.x系を使っているプログラムのために2.xを入れているようですが、自分は2.x系で書いたPythonプログラムを持っているわけでもなく、最新は3.xなので今後Ansibleとかの記事を書くために支障が出るので、今さらですが3.x系に置き換える
まずはひつようなリポジトリをインストール
yum install -y https://centos7.iuscommunity.org/ius-release.rpm
次に3.x系のPythonを探しインストール。pythonの公式だと3.6が最新のようなので3.6で検索。
    yum search python36

    yum install python36u python36u-libs python36u-devel python36u-pip
インストールしたらまずは確認
python
結果は以下の通り。まだ2.xがデフォルトなのでバージョンが2.7.5になっている。
    Python 2.7.5 (default, Aug  4 2017, 00:39:18)

    [GCC 4.8.5 20150623 (Red Hat 4.8.5-16)] on linux2

    Type "help", "copyright", "credits" or "license" for more information.

    >>>
3.xが動くか確認するには以下のようにpythonの後ろにバージョン番号を明示的に指定する必要がある。
python3.6
結果は以下の通り。
    Python 3.6.4 (default, Dec 19 2017, 14:48:12)

    [GCC 4.8.5 20150623 (Red Hat 4.8.5-16)] on linux

    Type "help", "copyright", "credits" or "license" for more information.

    >>>
これでも一応動くのですが、通常使うPythonのバージョンを3.6にしたいので、2.7から3.6に切り替えます。
    ln -s /bin/python3.6 /bin/python3

    unlink /bin/python

    ln -s /bin/python3 /bin/python

    ln -s /bin/pip3.6 /bin/pip
もう一度pyhon
    # python

    Python 3.6.4 (default, Dec 19 2017, 14:48:12)

    [GCC 4.8.5 20150623 (Red Hat 4.8.5-16)] on linux

    Type "help", "copyright", "credits" or "license" for more information.

    >>>
これで3.6に変わったので今後pythonの記事は3.x系で記載していきます。 ちなみに2.7に戻したい時は先ほどのリンカーを2.7で設定すればよいです。
Dockerをインストール
先月VirtualBoxのインストールの記事を載せましたが、VirtualBoxのようにホストOS上に仮想マシンを作るハイパーバイザ型の仮想マシンではホストOSとゲストOSを分離できる分、イメージサイズが大きくなりがちでオーバヘッドが大きくなり動作が遅くなる欠点がありました
実際仕事でもこのvirtualboxでwebアプリ開発を行っているのですが
環境配布は簡単ですがイメージファイルがでか過ぎてコピーに時間がかかったり
PCのメモリとかが少ないと起動や処理スピードが遅いなどで結構不便を強いられてます。
今回は軽量だと謳っているコンテナ型のDockerをcentosにインストールしたのでそのメモを残しておきます。
まずは、レポジトリを追加します。
yum-config-manager --add-repo https://download.docker.com/linux/centos/docker-ce.repo
yumのパッケージインデックスを更新
yum makecache fast
Dockerをインストール
    yum install docker-ce-17.12.0.ce-1.el7.centos

    yum install docker-ce
サービスを起動
systemctl start docker
以下のコマンドを実行し動作確認します。
docker run hello-world
すると以下のようなメッセージを出力します。
    Unable to find image 'hello-world:latest' locally
    latest: Pulling from library/hello-world
    ca4f61b1923c: Pull complete
    Digest: sha256:66ef312bbac49c39a89aa9bcc3cb4f3c9e7de3788c944158df3ee0176d32b751
    Status: Downloaded newer image for hello-world:latest

    Hello from Docker!
    This message shows that your installation appears to be working correctly.

    To generate this message, Docker took the following steps:
     1. The Docker client contacted the Docker daemon.
     2. The Docker daemon pulled the "hello-world" image from the Docker Hub.
        (amd64)
     3. The Docker daemon created a new container from that image which runs the
        executable that produces the output you are currently reading.
     4. The Docker daemon streamed that output to the Docker client, which sent it
        to your terminal.

    To try something more ambitious, you can run an Ubuntu container with:
     $ docker run -it ubuntu bash

    Share images, automate workflows, and more with a free Docker ID:
     https://cloud.docker.com/

    For more examples and ideas, visit:
     https://docs.docker.com/engine/userguide/
これはDocker Hubからhello-worldイメージをダウンロードし、ダウンロードしたイメージからコンテナが 起動し、コンテナが標準出力したのち終了していることを表示しているようです。 確認出来たら、通常使うユーザをdockerのグループに登録します。
sudo usermod -aG docker $USER
コマンドの前にsudoをいれたのは一般ユーザに戻って子のコマンドを実行したためです。rootユーザで直接ユーザを 指定してもよいともいます。 最後に、dockerをOS起動時に起動するように自動起動を有効にします。
systemctl enable docker
これでインストールが完了したので実際にOSのイメージを入れて使ってみたいと思います。
WindowsからCentOS7へリモートデスクトップで接続する。
今回は、Windowsに標準でインストールされているリモートデスクトップでジャンクPCのCentOSに接続する手順をまとめます。
今回は「xrdp」というオープンソースのサーバソフトウェアを使っていきます。
CentOSの標準のリポジトリにはないのでエンタプライズ用の拡張パッケージであるEPELをインストールして外部リポジトリから必要なライブラリ等をインストールします。(rootで行います)
  mkdir EPEL
  cd EPEL
  wget http://dl.fedoraproject.org/pub/epel/7/x86_64/Packages/e/epel-release-7-11.noarch.rpm
  wget http://li.nux.ro/download/nux/dextop/el7/x86_64/nux-dextop-release-0-5.el7.nux.noarch.rpm
  rpm -ivh epel-release-7-11.noarch.rpm
  rpm -ivh nux-dextop-release-0-5.el7.nux.noarch.rpm
次に、xrdp、および関連する tigervnc-server をインストールします。
yum install -y xrdp tigervnc-server
リモート接続した際に日本語キーボードに対応させるため必要なライブラリを入れます。
  cd /etc/xrdp
  wget http://www.mail-archive.com/xrdp-devel@lists.sourceforge.net/msg00263/km-e0010411.ini
  cp km-e0010411.ini km-0411.ini
  cp km-e0010411.ini km-e0200411.ini
  cp km-e0010411.ini km-e0210411.ini
サービス起動できるようにサービスを有効にします。
  systemctl start xrdp.service
  systemctl enable xrdp.service
このままだとファイアーウォールに引っかかてしまいリモート接続できないのでRDP 経由 (ポート番号: 3389) でネットワーク接続できるようにします。
  firewall-cmd --permanent --zone=public --add-port=3389/tcp
  firewall-cmd --reload
では確認。
windowsでリモートデスクトップを起動し、IPアドレスかホスト名を入力
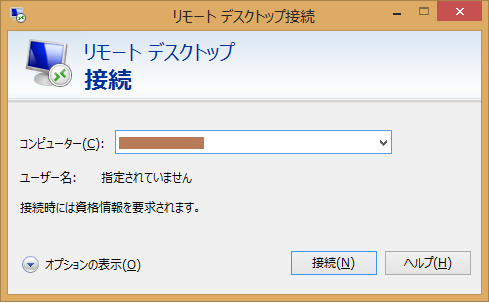
うまく接続できたら、警告が出ますがそのまま進み以下の画面を表示されることを確認。
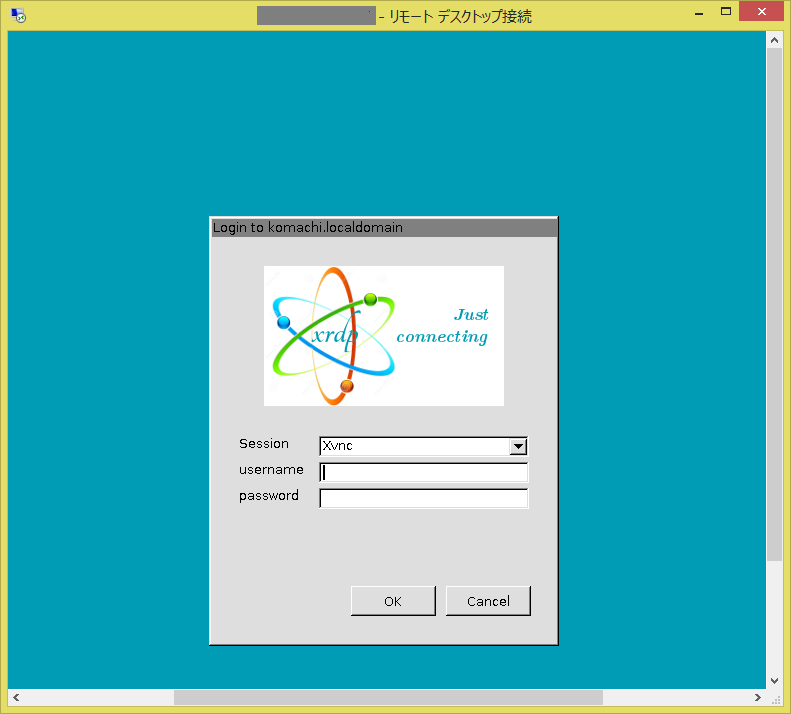
これがログイン画面になりますのでいつも入っているユーザでログインします。
ログインが成功するとデスクトップが出るんですが自分の環境ではSeLinuxがうごいているので管理者パスワードを入れろと言われます。
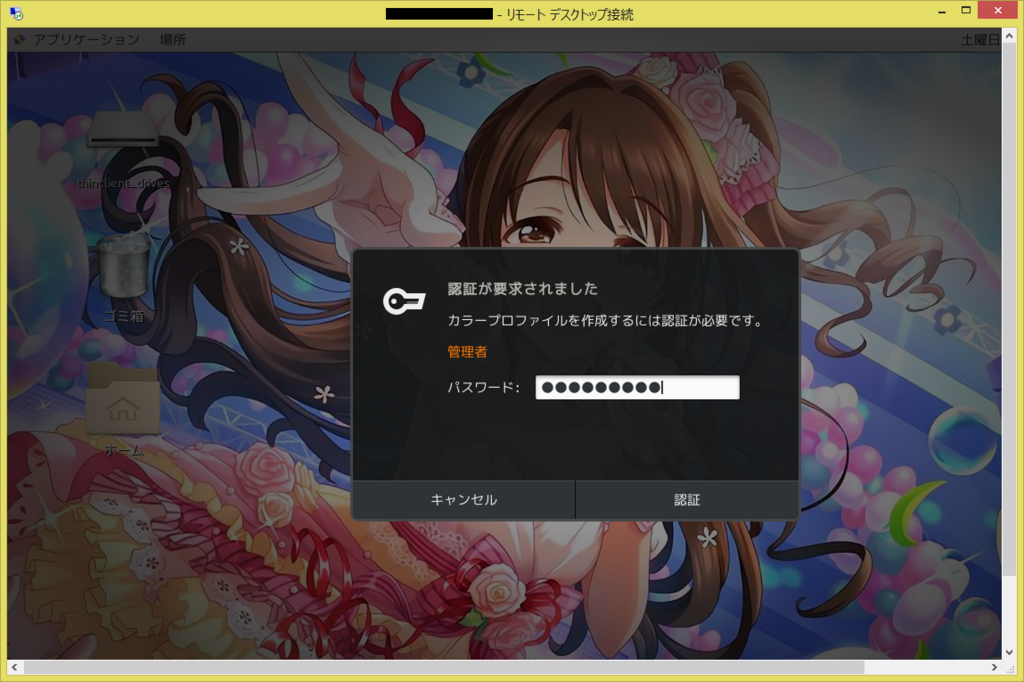
管理者パスワードで認証が成功すると以下のように卯月が・・・じゃなかったデスクトップが表示されます。

今回ノートPCだったんで別にこれしなくてもよかったのですが、メイン機を別の部屋で使っているときにこいつにつなげたい時があるのでやってみました。
参考: